


Ads by Google


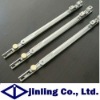
Product | doors and windows sealing strips |
Size | Standard and customized sizes available |
Material | EPDM, PVC , TPE, TPV etc |
Color | according to your need |
Temperature | (-40 °C ~ +120 °C) |
Application | aluminum alloy doors and windows seal, plastic-steel windows and doors curtain Wall Equipment , etc. |
Function | Quakeproof ,sealing, etc. |
Feature
| high and low temperature resistance, wear resistancehigh and low pressure resistance, oil resistance, non-toxicSafety and Health |
Adhesive-backed weather-stripping is inexpensive and lasts one to three years.
2Clean the part of the window where you’ll install the weather-stripping.Using soap and water, thoroughly clean the area and let it dry completely.
Enlarge3Cut the strip to the length you want.Use a measuring tape to measure the length of each V-channel, or hold the weather-stripping in position and cut a piece slightly longer than needed.
4Raise the inner sash up as high as it’ll go.Get some help if the window sticks.
Enlarge5Apply the first piece of weather-stripping to the inner sash.Peel away the backing of the strip, leaving the last inch of tape in place. Press the strip in place with the point of the V facing inside.
Enlarge6Apply the second piece of the weather-stripping and then close the window.Install this strip the same way as you did on the first piece.
Enlarge7Remove the backing from the top of the weather-stripping that protrudes above the sash, and press it in place.You’ve completed weather-stripping the sides of the inner sash.
Enlarge8Lower the outer sash as far as it will go and install the weather-stripping on this sash the same way that you did on the inner sash.The only difference here is that you should leave the backing at the bottom of the strip in place until you raise the window.
Enlarge9Raise the inner sash and apply a strip of weather-stripping to the bottom of the sashWeather-stripping your windows also helps block outside noise.
10Lower the outer sash and put a strip on top.You’re almost done! 11.Lower the outer sash far enough to expose the inside face of the bottom of the sash; clean this surface, and apply a strip of weather-stripping with the point of the V facing down.Sit back and relax with the thought that your weather-stripping effort also helps keep out bugs and insects!
Please Feel Free To Contact Us, We Will Always Be Pleased To Offer You Our Best Service!